Preheat and prep: heat the oven to 400°F (200°C) and grease two standard 12-cup mini muffin tins, or line a large baking sheet with parchment (muffin tins give the roundest puffs; a free-form sheet gives rustic, spread-out ones — both are correct).
Scald the liquid: combine the milk, oil, and salt in a small saucepan and bring just to a strong simmer over medium heat — small bubbles breaking at the edges, not a rolling boil. Pour the hot liquid over the tapioca flour in a large bowl and stir with a fork until every bit of flour is moistened. Let it rest 10–15 minutes until warm, not hot — this scald pre-gelatinizes the tapioca starch and is what makes the dough pliable; a rest long enough to cool protects the eggs from scrambling.
Blend the batter: scrape the warm tapioca mixture into a blender, add the eggs and the grated cheese, and blend on high for about 1 minute, until completely smooth — the batter should pour like thick pancake batter, glossy and stretchy. No blender? Beat the eggs into the cooled dough one at a time with a sturdy spoon, then work in the cheese; knead briefly by hand until smooth.
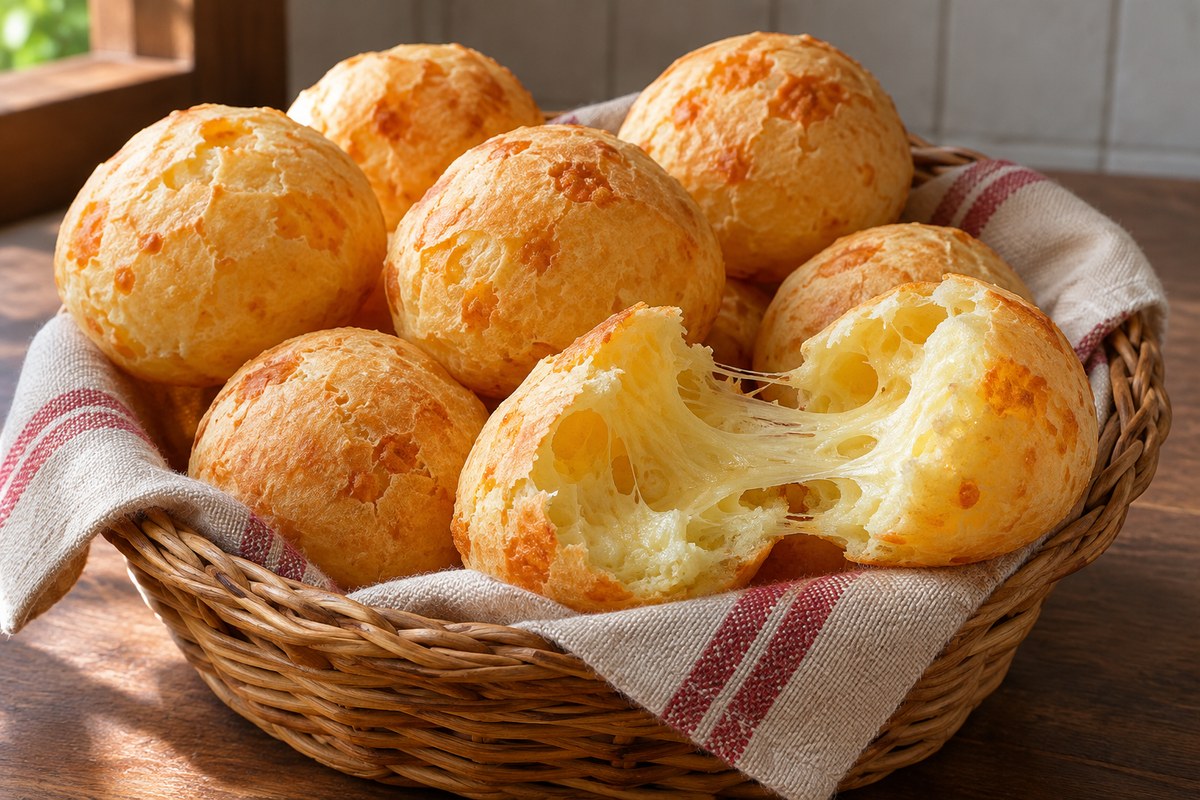
Fill and bake: pour the batter into the prepared cups, filling each about three-quarters full (a measuring cup or pitcher is faster than a spoon). Bake 20–25 minutes, without opening the door before the 18-minute mark, until the puffs have risen, gone from cream-pale to deep golden with darker crackled spots, and feel hollow-ish when tapped. Under-baked puffs collapse gummy; deep gold is the target, not pale cream.
Serve warm: eat them warm, straight from the tin — the shell is crispest in the first 15 minutes out of the oven and the interior stays chewy for hours. Rewarm leftovers 3–4 minutes in a 350°F oven; skip the microwave, which toughens the tapioca.
Why did my pão de queijo collapse or turn out gummy inside?
Under-baking is the usual cause — the puffs look done while the centers are still wet batter, and they deflate as they cool. Bake until they are genuinely deep golden with darker crackled spots (20–25 minutes at 400°F), not just puffed and pale, and resist opening the oven in the first 18 minutes, when steam is doing the rising. Gummy interiors also trace to a batter that was too wet: measure the tapioca flour by weight (250 g) or by spoon-and-level cups, and let the scalded mixture rest before adding eggs so the starch fully hydrates.
What can I substitute for Minas cheese, and can I make them without tapioca flour?
The standard Minas swap is half queso fresco + half parmesan — the queso fresco gives the mild milky base, the parmesan gives salt and tang; all-parmesan works for sharper puffs, and a little mozzarella adds stretch. Tapioca flour (polvilho) itself has no substitute: it is the identity of the recipe, the starch that creates the chewy-airy, gluten-free texture — cornstarch, rice flour, or almond flour will give you flat, crumbly cheese cookies instead. Buy “sweet tapioca flour” (polvilho doce) in Latin markets or online; it keeps for months.
Can I freeze pão de queijo, and how do I reheat them?
Yes — and freezing is the professional move. Two options: freeze the filled muffin cups solid, then bag the raw frozen puffs and bake from frozen (400°F, 25–28 minutes, no thawing), or bake fully, cool, and freeze the baked puffs. Reheat baked puffs in a 350°F oven for 3–4 minutes to re-crisp the shell; the microwave will make the tapioca chewy-tough, so save it for emergencies. Frozen unbaked puffs keep 3 months, baked puffs about 2 months.
Why did my pão de queijo collapse or turn out gummy inside?
Under-baking is the usual cause — the puffs look done while the centers are still wet batter, and they deflate as they cool. Bake until they are genuinely deep golden with darker crackled spots (20–25 minutes at 400°F), not just puffed and pale, and resist opening the oven in the first 18 minutes, when trapped steam is doing the rising. Gummy interiors also trace to a too-wet batter: measure the tapioca flour by weight (250 g) or spoon-and-level cups, and let the scalded mixture rest and cool before the eggs go in so the starch fully hydrates.
What can I substitute for Minas cheese, and can I skip the tapioca flour?
The standard Minas swap is half queso fresco + half parmesan — the queso fresco gives the mild, milky base and the parmesan gives salt and tang; all-parmesan makes sharper, more assertive puffs, and a handful of mozzarella adds stretch. Tapioca flour (polvilho) itself has no substitute: it is the identity of the recipe, the starch that builds the chewy-airy, naturally gluten-free texture. Cornstarch, rice flour, or almond flour will give you flat, crumbly cheese cookies instead. Look for “sweet tapioca flour” (polvilho doce) in Latin markets or online.
Can I freeze pão de queijo, and how do I reheat it?
Yes — freezing is the professional move. Freeze the filled muffin cups solid, then bag the raw frozen puffs and bake straight from frozen (400°F for 25–28 minutes, no thawing), or bake fully, cool, and freeze the baked puffs. Reheat baked puffs in a 350°F oven for 3–4 minutes to re-crisp the shell; the microwave turns tapioca chewy-tough, so save it for emergencies. Frozen unbaked puffs keep 3 months; baked puffs about 2 months.