Make the dough: in a large bowl, whisk the flour, fine salt, and yeast together. Add the lukewarm water and 2 tablespoons of the olive oil, and stir with a wooden spoon until a shaggy, sticky dough forms and no dry flour remains. It will look loose and wet — that is exactly right for focaccia.
Cover the bowl tightly with plastic wrap (or a damp towel) and let it rest at room temperature for 20 minutes. This short autolyse lets the flour absorb the water and makes the dough much easier to handle — do not skip it.
First rise: uncover the bowl and, with oiled hands, fold the dough over itself 4–6 times: reach under one side, lift it up and over the center, then rotate the bowl a quarter turn and repeat. Re-cover and let it rise at room temperature until doubled and bubbly, 60–90 minutes (see the overnight option in the tips for an even better crust).
Prepare the pan: pour 2–3 tablespoons of olive oil into a 9×13-inch (23×33 cm) baking pan and spread it over the entire bottom with your fingers. Tip the risen dough into the pan. Instead of punching it down, stretch it gently — it will not reach the corners yet, and that is fine.
Second rise: cover the pan with a damp towel and let the dough rest for 45–60 minutes, until it is puffy and relaxed enough to stretch to the edges. If it resists, let it rest 10 more minutes and stretch again — patience beats tearing.
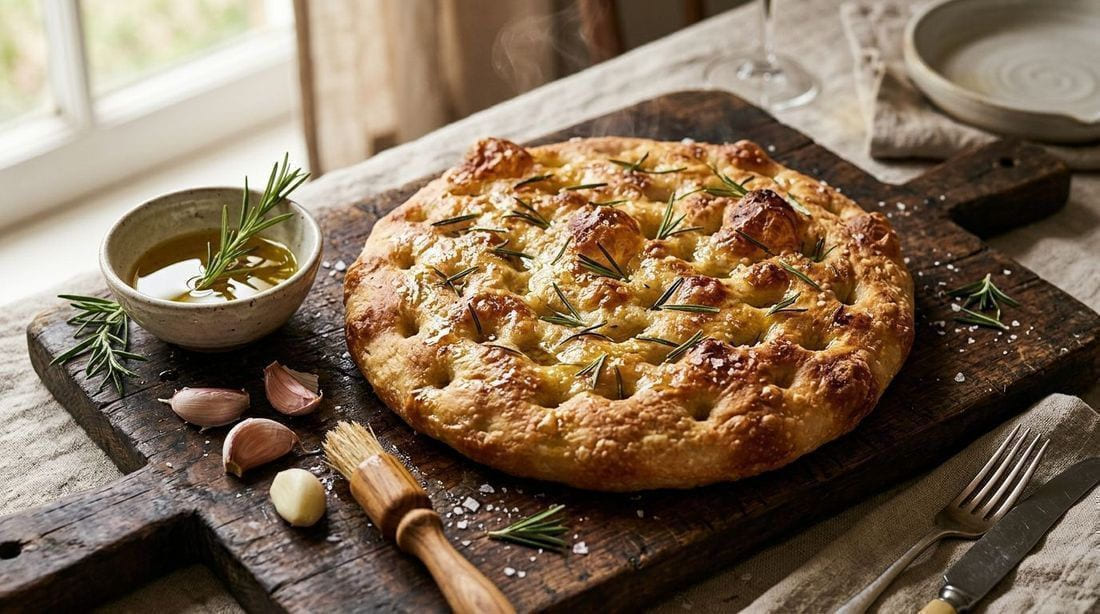
Dimple and season: preheat the oven to 425°F (220°C) with a rack in the middle. Drizzle the top with the remaining olive oil. Then press your fingertips straight down into the dough — all the way to the bottom of the pan — working in a grid until the whole surface is dimpled. Scatter the rosemary, garlic if using, and flaky sea salt over the top.
Bake on the middle rack for 25–30 minutes, until the top is deeply golden and the bottom is crisp (lift an edge to check — it should be browned and sound hollow). Let it cool in the pan for 10 minutes, then slide it onto a cutting board. Cut into squares and serve warm; the crisp edges are the best part, so do not be shy about fighting over the corners.
Which flour is best for focaccia?
Bread flour gives the strongest, airiest structure and is the easy winner. All-purpose flour works well too — the crumb will be a touch softer and less open, but still pillowy and delicious. Avoid whole-wheat-only doughs unless you are experienced: the low gluten and extra bran make a dense, heavy focaccia. If you want whole-grain character, substitute up to 25% of the bread flour with whole wheat and expect a slightly longer rise.
Can I make focaccia dough ahead of time?
Yes, and it is the best-kept secret of this recipe. After the first rise (or even before it), cover the bowl and refrigerate the dough for 12–24 hours. The next day, proceed from the step where you pour the dough into the oiled pan and give the second rise a bit longer — the cold dough needs 60–90 minutes to puff. The cold ferment deepens the flavor noticeably and gives a more open crumb.
What do you serve with focaccia?
Focaccia is the most versatile bread on the table: tear it alongside pasta or a big tomato salad, split it for sandwiches, or serve it with dips (hummus, zaalouk, or a bowl of olive oil and balsamic). It also freezes beautifully — wrap cooled pieces tightly and freeze for up to 3 months, then reheat straight from frozen in a 375°F (190°C) oven for 8–10 minutes.
Why is my focaccia dense and flat instead of puffy and airy?
A heavy, flat focaccia is almost always an under-proofed or over-kneaded dough — or both. The dough needs the full rise time until it is doubled and bubbling (60–90 minutes at room temperature, longer in a cool kitchen), and the second rest in the pan until it is puffy and springs back slowly when poked. If you worked the dough hard, the gluten tightens and resists spreading. Also check your yeast: instant yeast should fizz gently when mixed into lukewarm — not hot — water; water above 120°F (50°C) kills the yeast dead. A trick that rescues a sluggish dough: give it 30 more minutes in a turned-off oven with the light on, then bake anyway — even a modest rise bakes into something crisp-edged and good, just less open.
My focaccia dough is impossibly sticky — is something wrong?
No — high-hydration doughs are sticky by design, and that stickiness is what bakes into focaccia’s hallmark open crumb. Resist adding flour: instead, use wet or oiled hands for every touch. Oil your hands before folding and stretching, and pour the olive oil into the pan before tipping the dough in — the dough should never touch a dry surface. If it is so wet it barely holds a shape (rather than a loose, shaggy mass), one careful extra tablespoon of flour at the mixing stage is fine, but stop there: a dry, flour-dusted dough is the surest path to a heavy, bready focaccia.
Can I use a different pan size, and where should the oven rack be?
Yes — pan size just changes thickness and bake time. A 9×13-inch pan gives the classic medium-thick focaccia in 25–30 minutes. A larger rimmed baking sheet (about 12×17 inches) makes a thinner, extra-crispy version — check it 5 minutes earlier. A smaller pan, like a 9×9-inch or round cake pan, gives a taller, doughier focaccia — add 5–8 minutes and watch the color. Whatever you use, it must have rims, or the olive oil runs off the edges. Bake on the middle rack so the top browns evenly without the bottom burning; if your oven runs hot and the top browns too fast, drop to 400°F (200°C) and add a few minutes.
 Cuisine