Soak the chiles: tear the stemmed, seeded guajillo and ancho chiles into flat pieces and cover with 2 cups of hot water. Weigh them down with a small plate or bowl so they stay submerged, and soak for 20–30 minutes until fully rehydrated and pliable. The water is liquid gold — keep it for the sauce.
Build the sauce: once the chiles are soft, transfer them to a blender with about 1 1/4 cups of the soaking water (reserve the rest). Add the garlic, onion, oregano, cumin, tomato paste, vinegar, and salt. Blend until completely smooth — 60 to 90 seconds, scraping down the sides once. It should be the texture of a thin, velvet-y purée; loosen with extra soaking water if it is thicker than heavy cream.
Cook the sauce: heat the oil in a medium saucepan over medium heat and carefully pour in the purée — it will splatter a little. Cook for 5–7 minutes, stirring constantly, until it deepens a shade, thickens slightly, and no longer tastes raw. Taste and adjust salt. This is the moment the sauce goes from good to great, so trust the tasting. Set aside, keeping it warm.
Season the chicken: toss the shredded chicken with the chopped onion, cumin, smoked paprika, and a generous pinch of salt and pepper. Set aside with 2 cups of the cheese. You want the filling boldly seasoned — the tortillas and sauce will dilute it slightly in the bake.
Prep the assembly station: heat the oven to 375°F (190°C). Spread a thin layer of the warm sauce across the bottom of a 9×13-inch baking dish — this keeps the tortillas from sticking and adds flavor. Warm the tortillas in a dry skillet, one at a time, 20 seconds per side, or stack them between damp paper towels and microwave 45 seconds. Warm tortillas roll without cracking; this step is not optional.
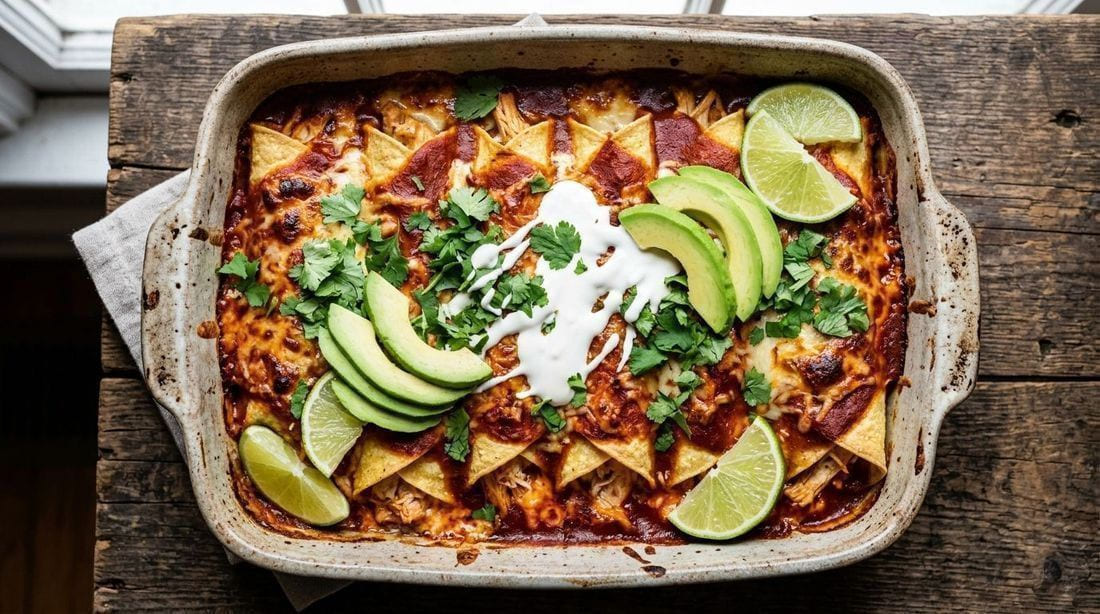
Roll the enchiladas: one at a time, spoon about 1/4 cup of the chicken filling down the center of each tortilla, sprinkle with a little cheese, and roll tightly. Place seam-side down in the baking dish, snug against each other, in two rows of six.
Sauce, cheese, and bake: pour the remaining sauce over the top, covering every tortilla completely (the edges need sauce or they will dry into brittle chips), then scatter the remaining 1 cup of cheese over everything. Bake 25–30 minutes, until the sauce bubbles at the edges and the cheese is fully melted and golden in spots. Rest 10 minutes before serving — the sauce sets as it cools slightly, making the portions much cleaner — then top with cilantro, crema, avocado, and lime at the table.
Why are my enchiladas soggy?
Soggy enchiladas come from one of three places: tortillas that were not warmed and fried lightly, too much sauce pooling on top, or the dish going into the oven cold. Warm each tortilla in a dry skillet for 20 seconds per side (or microwave the stack 45 seconds between damp towels) so the corn sets and holds structure. Keep the sauce layer on top generous but not drowning — about 1 1/2 to 2 cups over the whole dish is right. And if your sauce is very thin, reduce it on the stove for a few extra minutes until it barely coats a spoon before baking.
Red or green enchilada sauce — which is more traditional?
Both are completely traditional — the choice is regional and personal. Red sauce (salsa roja) is built from dried red chiles like guajillo and ancho: smoky, sweet, brick-red, and the classic for chicken and beef enchiladas across central and northern Mexico. Green sauce (salsa verde) is made from tomatillos and green chiles: bright, tangy, and herbaceous, and the classic for enchiladas suizas, which add a creamy tomatillo sauce and Swiss cheese. Cook what you love: red for this recipe, but salsa verde enchiladas are equally authentic — and equally worth the oven time.
How do I store and reheat leftovers?
Baked enchiladas keep beautifully for 3 days and freeze for up to 3 months. For the fridge: cool completely, cover tightly, and reheat individual portions in the microwave (90 seconds to 2 minutes) or a 350°F oven under foil for 15 minutes. To freeze the whole dish: assemble through the sauce-and-cheese step in a foil pan or freeze-safe dish, do not bake, wrap tightly in two layers, and freeze. Bake straight from frozen at 375°F for 55–65 minutes, adding 10 minutes under loose foil if the top browns too fast. Tip: bake one, freeze one — enchiladas are the original make-ahead dinner.
Corn or flour tortillas — which should I use for enchiladas?
Corn tortillas are the traditional choice and the right one for this recipe: they hold up to the sauce soak and bake with a toothsome, slightly rustic texture that flour tortillas never match. Flour tortillas work in a pinch and make a softer, burrito-adjacent enchilada, but they turn mushy faster and hide the chile flavor under wheat. Whatever you buy, go for 6-inch tortillas at room temperature, warmed before rolling — cold tortillas of either kind crack. And if you are making this gluten-free, corn is the answer anyway: corn tortillas are naturally gluten-free, while flour tortillas usually are not.
How do I make enchilada sauce less bitter or too spicy?
Bitterness in a chile sauce usually means the dried chiles were scorched or the stems and seeds were not fully removed before soaking. Toast very lightly — a few seconds per side, just until pliable and fragrant, never smoking — and take the stems and seeds out before they hit the water. If you still land bitter, a fat of sweetness fixes most of it: a tablespoon of tomato paste or a pinch of sugar stirred into the cooked sauce rounds it out. For heat, remember capsaicin lives in the seeds and ribs — guajillo is mild and fruity, so a pure-guajillo sauce is barely spicy; the fire comes from adding arbol chiles, and that is always your call — the recipe just points the way.
Can I use rotisserie chicken or make this ahead of time?
Yes to both — the recipe is built for them. A store rotisserie chicken is the single best shortcut: shred the meat from one bird and you have the 2 1/2 cups the recipe needs, seasoned to taste with the onion, cumin, and paprika. For make-ahead, assemble the enchiladas completely through the sauce-and-cheese step, cover the dish, and refrigerate up to 24 hours before baking — add 5–10 minutes to the bake since it starts cold. Unbaked and tightly wrapped, they also freeze for up to 3 months; bake straight from frozen at 375°F (190°C) for 55–65 minutes, adding foil over the top if the cheese browns too fast.
 Cuisine